Lessons > Tutorial 2. Getting Started with GitHub
Due on Fri, 04/09 @ 11:59PM. 2.5 Points.
LEARNING OBJECTIVES
- Get familiar with the command line
- Install git and practice using it
- Register for GitHub and configure Git Pages
Part 1: Do the GitHub Tutorial (Ideally Prior to Your Tutorial)
Please complete the LinkedIn Learning GitHub tutorial before the tutorial to help you better follow along. In order to access the LinkedIn content, please sign in with your NU account.
Part 2: Intro to the Command Line
In tutorial, your TA will go over how to use the command line and some common commands. Django Girls is a good resource. I’ve also created a cheat sheet for you:
| DOS (Windows) | Shell (Mac / Linux) | |
|---|---|---|
| What directory am I in? | > cd |
$ pwd |
| Change directories | > cd |
$ cd |
| List files & directories | > dir> tree # lists subdirectories |
$ ls$ ls -l |
| Navigate to descendant directory | > cd eecs130\lectures\lecture03 |
$ cd eecs130/lectures/lecture03 |
| Navigate to sibling directory | > cd ..\lecture02 |
$ cd ../lecture02 |
| Navigate to ancestor directory | > cd ..\..\ |
$ cd ../../ |
| Navigate to home directory | > cd |
$ cd |
| Command history | > doskey /HISTORY |
$ history |
Other optional commands you may find useful…
| DOS (Windows) | Shell (Mac / Linux) | |
|---|---|---|
| Create a new file | > echo . > my_file.txt |
$ echo . > my_file.txt$ touch my_file.txt |
| Append to a file | > echo "some text" >> my_file.txt |
$ echo "some text" > my_file.txt |
| Save history to a file | > doskey /HISTORY > my_history.txt |
$ history > my_history.txt |
| Move a file | > move my_history.txt Documents/. |
$ mv my_history.txt Documents/. |
| Make a folder | > mkdir my_folder |
$ mkdir my_folder |
| Delete a file | > del my_history.txt |
$ rm my_history.txt |
| Delete a folder | > rmdir my_folder |
$ rm -r my_folder |
Part 3: Install Git
In order to interact with GitHub, you need to install git. Before you install it, check and make sure it’s not already installed by:
- Opening your Terminal (Mac) or Command Prompt (Windows) and typing the word
gitat the command prompt. - If you get a message that says “not recognized” or something along those lines, then you need to install it: https://git-scm.com/book/en/v2/Getting-Started-Installing-Git
Part 4: Register for an account on GitHub
If you don’t already have a GitHub account, register for one: https://github.com/join.
You will also need to create a “Personal Access Token”. The process is described here.
Part 5: Set Up Your repository
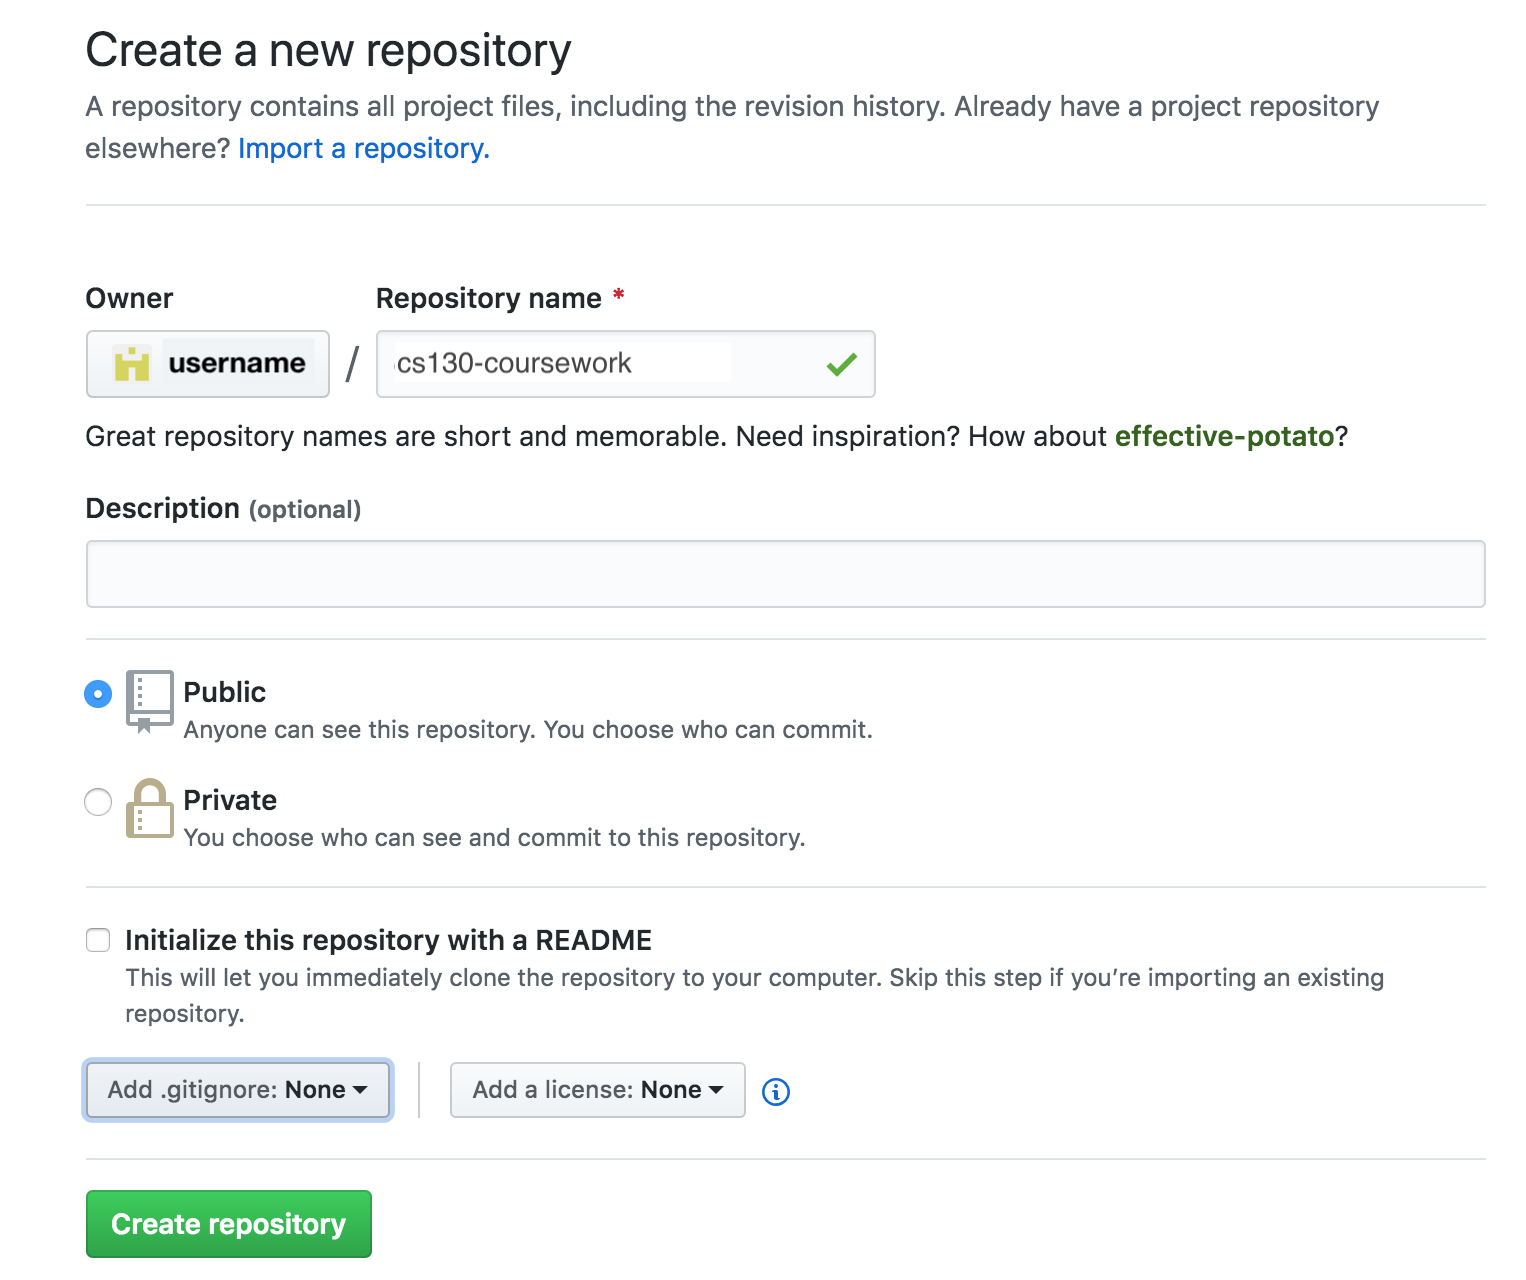
1. Create repository
- Once you’ve logged into GitHub, click on the “Repositories” tab (upper left-hand side of your screen), and then click the green “New” button.
- Name your repository
cs130-coursework, ensure that “public” is selected, and make sure you do NOT create a README.md file. - Then click the green “Create Repository” button.
2. Set up your local git repository and link it to GitHub
After you create your repository, you will be redirected to a screen that looks like the one pictured below:
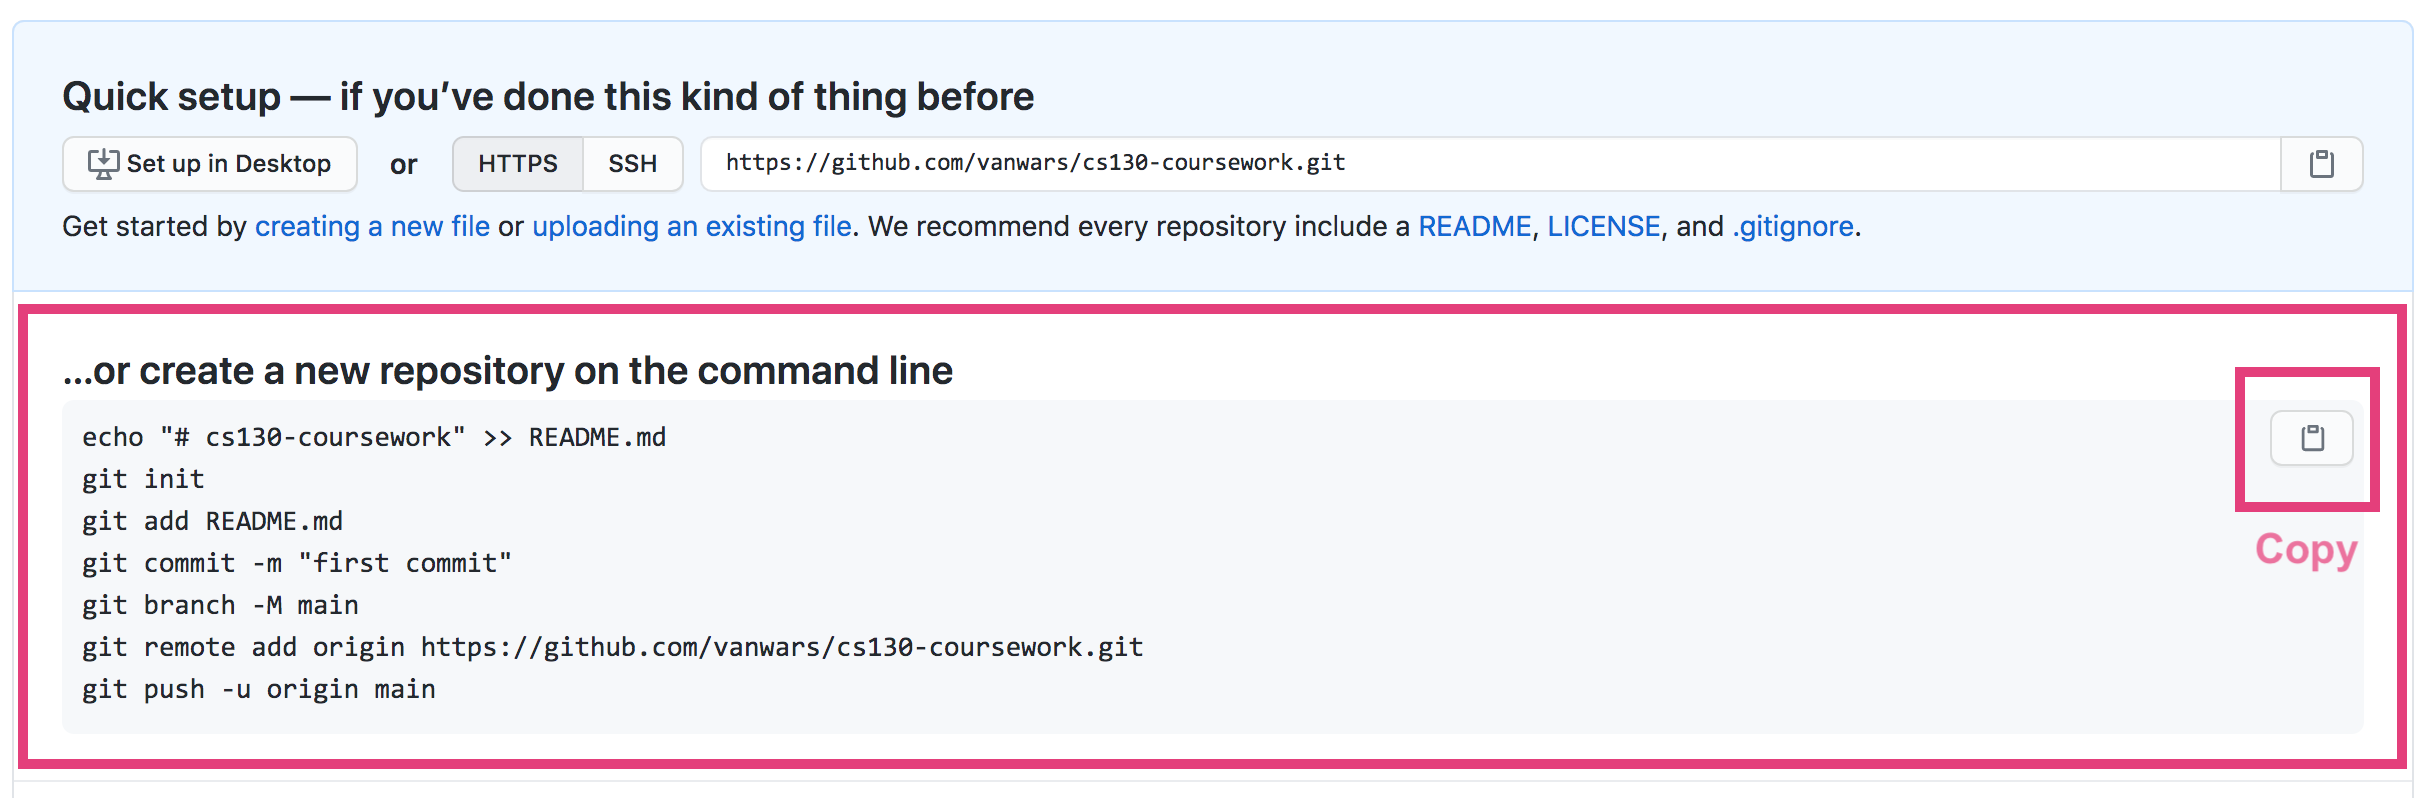
Copy the code underneath the “…or create a new repository on the command line” (by clicking the clipboard icon).
3. In your local cs130 folder, create a new folder called repo:
cs130
   ├── homework
   ├── tutorials
   ├── lectures
   └── repo
Navigate into your repo folder, and then paste the text you just copied from GitHub, which will look something like the text below (but different, as it will be pointing to your GitHub repository).
git init
git add README.md
git commit -m "first commit"
git branch -M main
git remote add origin {{ your repo address }}
git push -u origin main
What the above code means…
git init |
Initializes an empty git repository on your file system |
git add README.md |
Added the README.md file that git made to the list of files that are “tracked” by the repository. |
git commit -m "first commit" |
“Commits” the change locally (analogous to registering a savepoint with git) |
git branch -M main" |
Creates a new branch called “main.” |
git remote add origin {{ your repo address }} |
Creates an association between your computer and your GitHub repository (see step 2 above). |
git push -u origin main |
Posts your files to GitHub |
4. Add and commit tutorial01 folder (from last week) to your local and remote repo
- Copy your tutorial01 folder into your repo folder
- Check the status of your repo by typing:
$ git status
It should say that your tutorial01 files are “untracked” - Add all of your tutorial01 files to the list of files that are tracked by the repo by typing:
$ git add tutorial01 - Check the status of your repo again:
$ git status
It should now say that you tutorial01 files are being tracked. - Now, commit your new tutorial01 files to the repo by typing:
$ git commit -m "Adding my tutorial01 to the repo" - Finally, “push” your files to GitHub:
$ git push origin main
Part 6. Finally, Configure GitHub Pages
GitHub also allows you to host pages. To enable GitHub pages, go to your repository and click on the settings tab. Then, scroll halfway down to the GitHub Pages section, and in the dropdown menu below “Source,” select your main branch and then click the “Save” button.

This will generate a link to your GitHub site. A few caveats:
- GitHub pages are a bit buggy. For whatever reason, for the first few hours after you enable github pages , you *may have to tack on a index.html after the root website so that you don’t get a HTTP404 (page not found) error. Eventually, GitHub pages will resolve the root URL.
- GitHub pages does not support backends, but we will be addressing this in future homeworks.
What to turn in
Just paste in your links to Canvas:
- A link to your GitHub repository
- A link to your GitHub Pages