Assignments > Homework 2. HTML & CSS Practice: Spotify
Due on Fri, 04/30 @ 11:59PM. 10 Points.
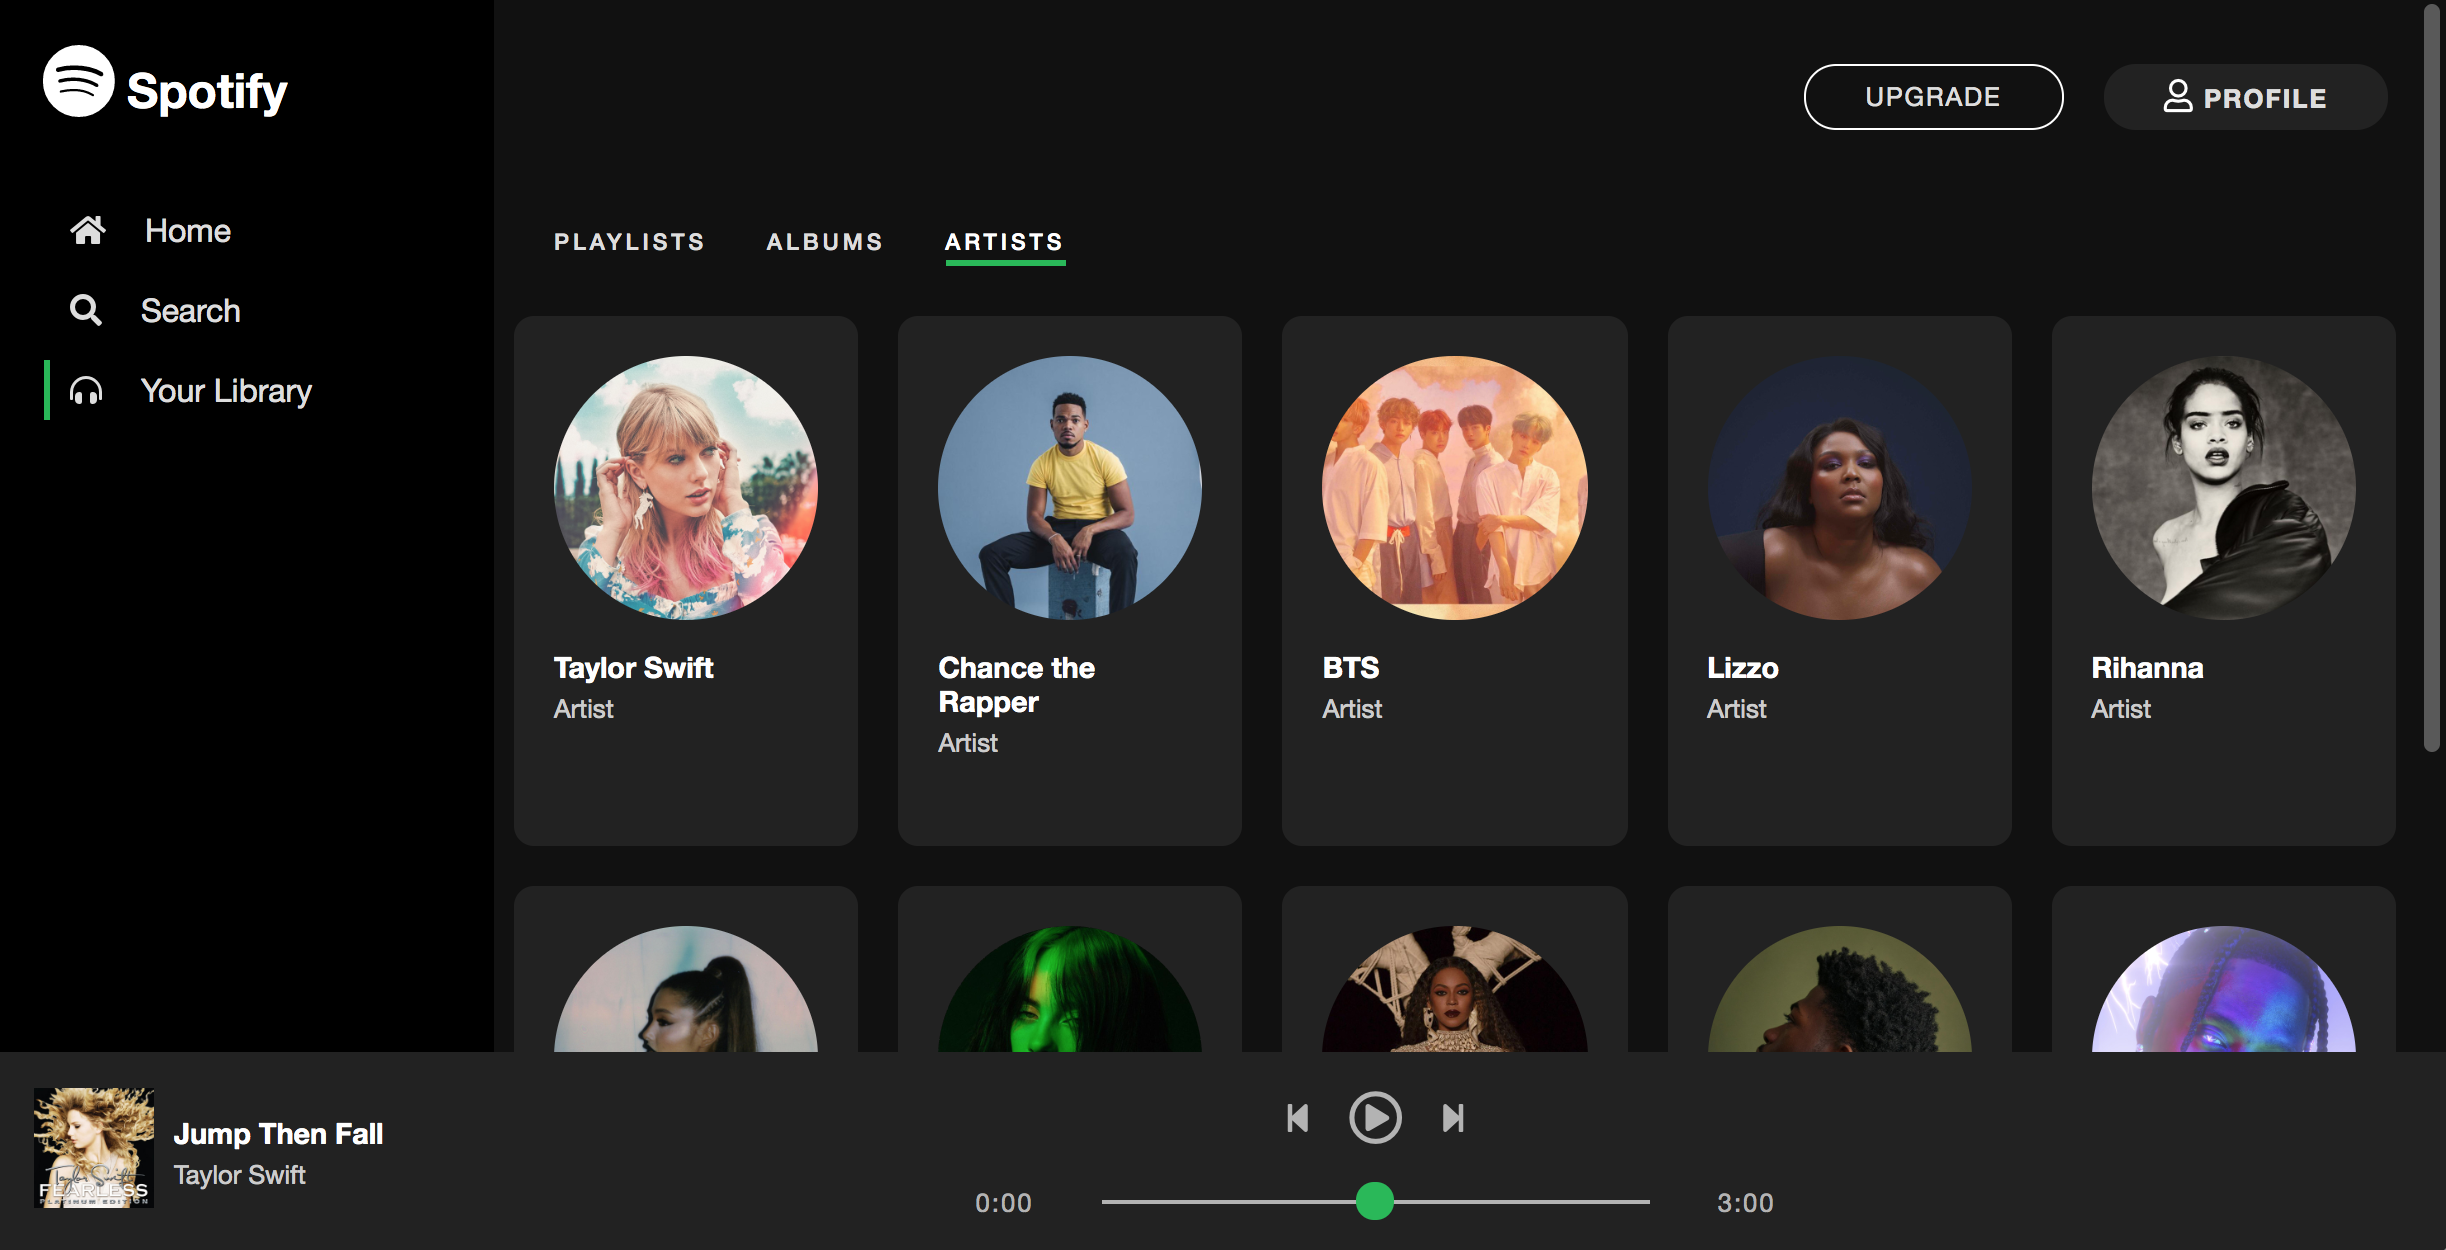
Now that you have some experience with CSS Grid and Flexbox (from Homework 1), you are going to implement elements of the Spotify UI (as pictured below). This week, you will be implementing the look-and-feel of the website. In a future assigment, you will actually be programming the interactions / data queries using JavaScript in order to pull down actual songs, images, and text down from the Spotify servers (and play some music).
Please read the instructions carefully and complete the 5 steps below, using the starter files.
A. Left Navigation
Complete the following tasks:
In the index.html file, add Font Awesome icons (Spotify logo, home, search, and headphones) within the “aside” tag (pictured below) in accordance with the screenshot. Note that the Font Awesome font reference is already included at the bottom of your index.html file. Your job is to search for relevant icons and include them. For instance, to get the Spotify icon, take a look here.
Other than adding the icons, you shouldn’t need to make any other changes to the HTML.
<aside id="sidebar">
    <h1>
        <!--TODO: Font Awesome Icon Here -->
        Spotify
    </h1>
    <a href="#">
        <!--TODO: Font Awesome Icon Here -->
        Home
    </a>
    <a href="#">
        <!--TODO: Font Awesome Icon Here -->
        Search
    </a>
    <a class="selected" href="#">
        <!--TODO: Font Awesome Icon Here -->
        Your Library
    </a>
</aside>
In the style.css file, add some CSS style rules to make the UI look like the screenshot (pictured above). You can accomplish this any way you want, but consider using flexbox and the box model (padding, margin, width, height, etc.). Be sure to put all of the CSS related to the left navigation in the “Part A: Left Navigation” section:
/***************************/
/* Part A: Left Navigation */
/***************************/

/* Your Code Here */
B. Header & Nav Styling
Next, style the header and nav sections to look like the the screenshot above:
<header>
    <a href="#" id="upgrade">Upgrade</a>
    <a href="#" id="profile">
        <i class="far fa-user"></i> Profile</a>
</header>
<nav>
    <a href="#">Playlists</a>
    <a href="#">Albums</a>
    <a class="selected" href="#">Artists</a>
</nav>
Like with Part A, try to achieve the alignment using flexbox (e.g. flex-direction, justify-content, align-items) and the box model (e.g. padding, margin, height, width). Be sure to put all of the CSS related to the the header and nav sections in the “Part B: Header & Nav Styling” section:
/********************************/
/* Part B: Header & Nav Styling */
/********************************/

/* Your Code Here */
C. Artists Panel
Next, you need to style the section cards that represent each Spotify artist (pictured above):
<article id="featured-content">
    <section class="artist-card">
        <div>
            <img src="https://i.scdn.co/image/62b33d12e2b9a033cf77585f6e3d4b2c6b3a63a1" />
            <h3>Taylor Swift</h3>
            <p>Artist</p>
            <span class="play-button"><i class="fas fa-play"></i></span>
        </div>
    </section>
    ...
</article>
Again, try to achieve the alignment using flexbox and the box model. Be sure to put all of the CSS related to the artist cards in the “Part C: Artist Panel” section:
/*************************/
/* Part C: Artists Panel */
/*************************/

/* Your Code Here */
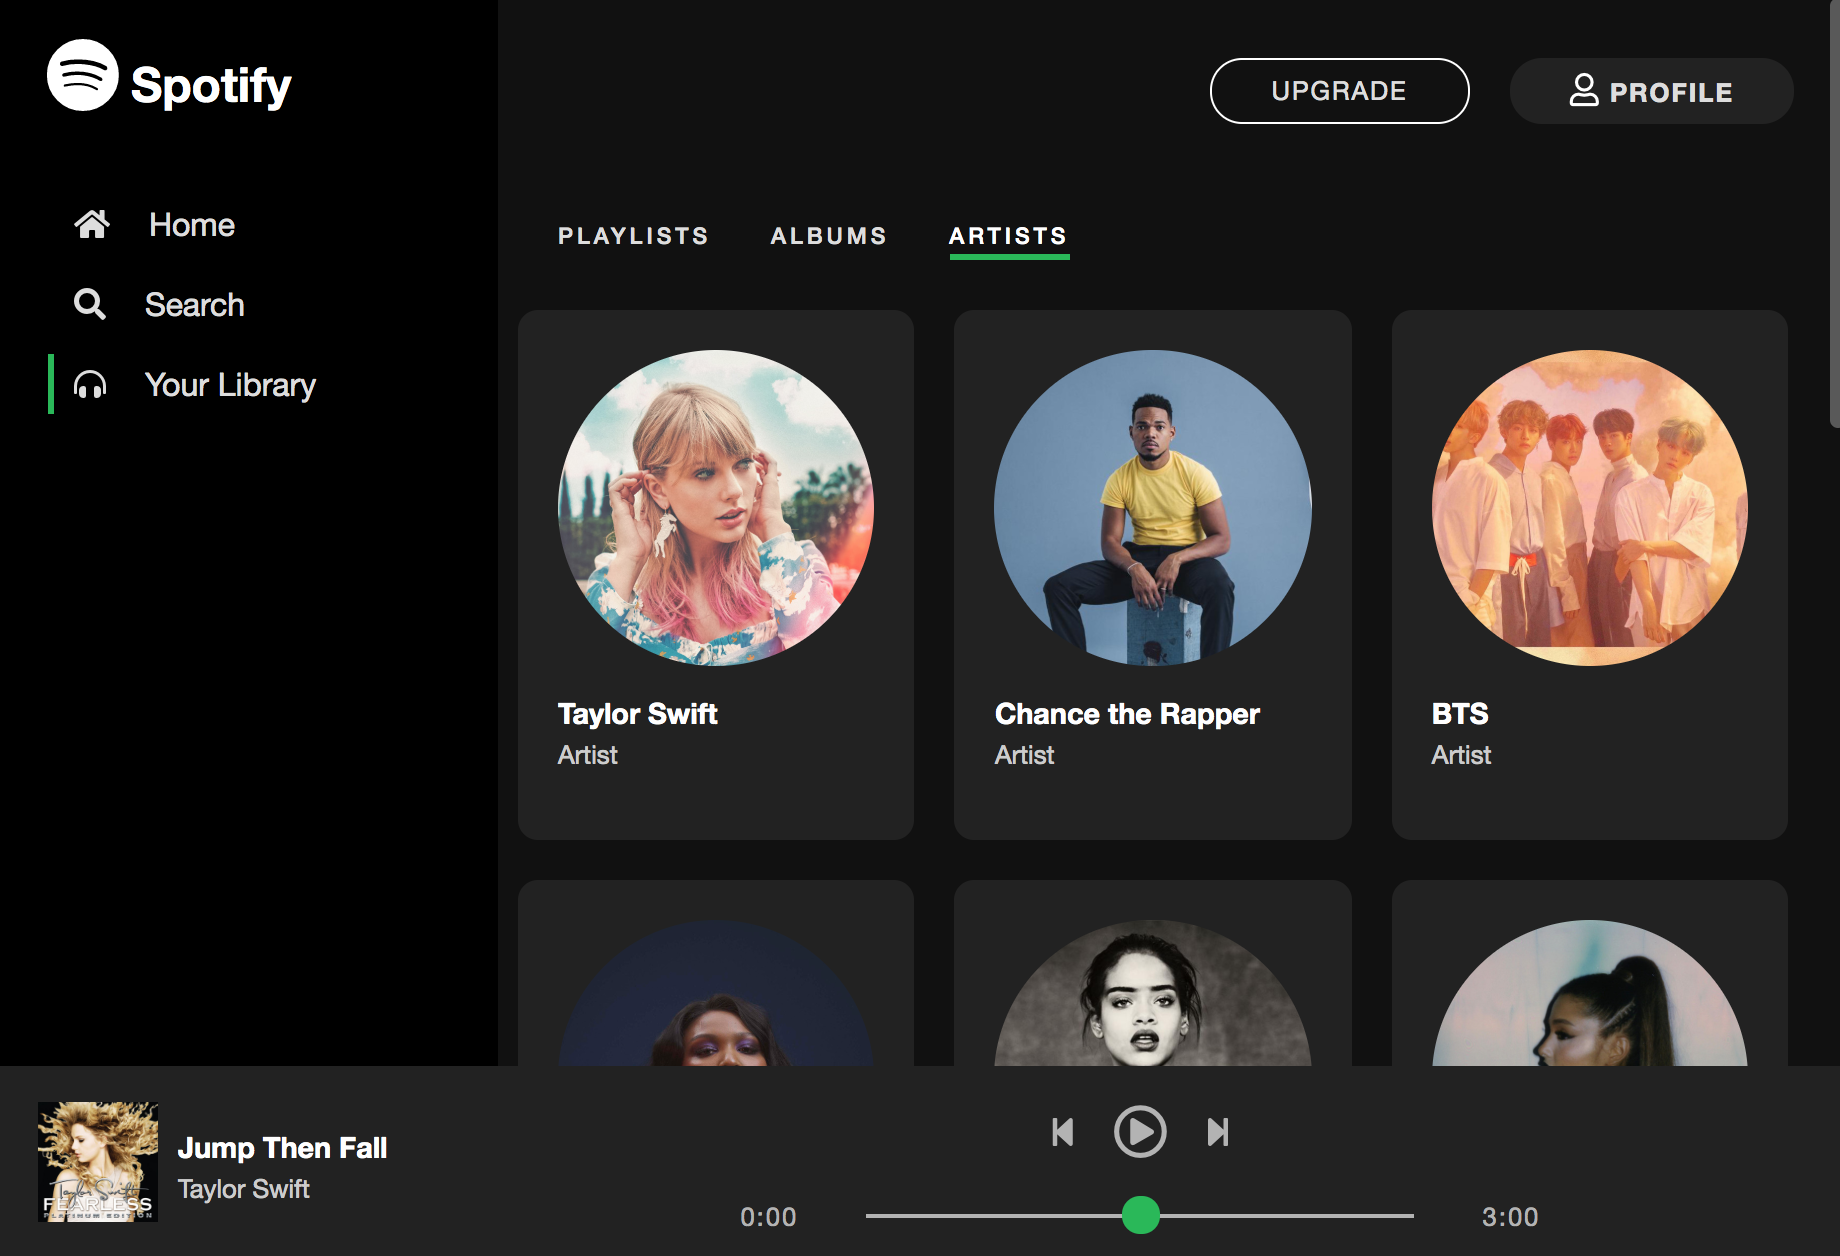
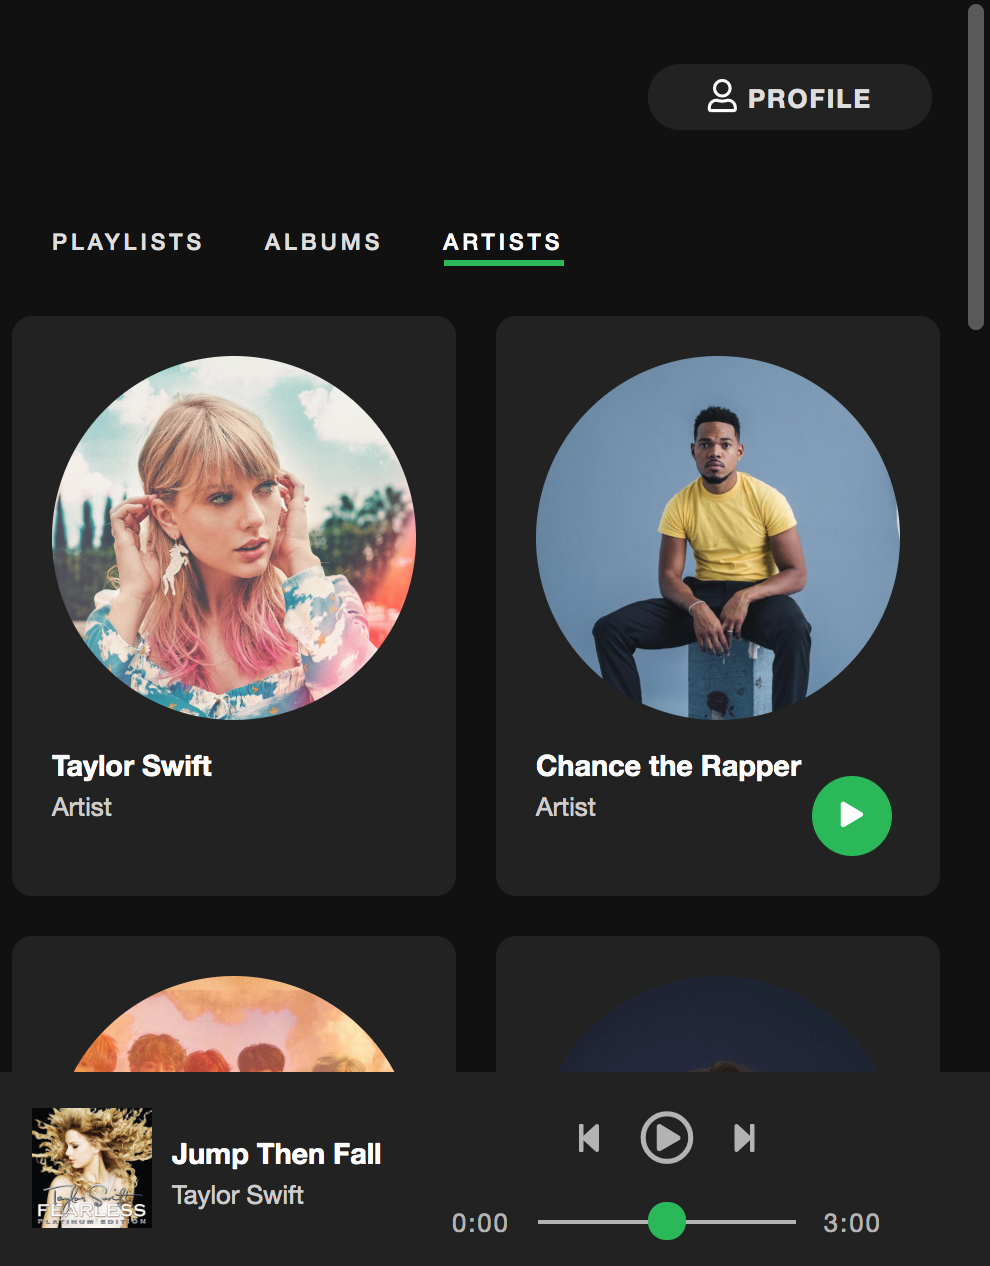
D. Create Responsive UIs
Create the following two responsive UIs shown below. If you’re using more than 10-15 lines of code to achieve each of these layouts, you’re on the wrong track. Add the CSS to make these responsive UIs to the “Part D: Responsive UIs” section of your style.css.
Tablet: Use Flexbox to display albums 3-across.
Mobile: Use Flexbox to display albums 2-across and hide the left menu.
E. Extra Credit: Hover Effects (1 Point)
Optional, but recommended:
If you have time, try to implement the 4 hover effects shown in this video. You can put the style rules for the extra credit anywhere in style.css.
Rubric (10 Points)
- Left Navigation (2 pt)
- Icons added
- Styling reflects screenshot
- Header & Nav Styling (2 pt)
- Artists Panel (3 pts)
- Responsive UIs Implemented (3 pt)
- Hover effects implemented (+1 pt extra credit)
What to turn in
To submit this week’s homework assignment, move your completed hw02 folder into your repo folder. Then add, commit, and push all of your files to GitHub. Your commands should look something like this:
$ git add hw02
$ git commit -am "Checking in my hw02 folder"
$ git push
Please also add a link to your Homework 2 page to the homepage you made in Lab 4.
When you’re done, submit the following to Canvas (under the Homework 2 assignment):
- A link to your homepage (on GitHub Pages), which should link to all of your assignments (including
hw02) - A link to your GitHub repository (where your code files are stored)